
#
Scene Editor
#
Access
The EDVR Scene Editor can be accessed via the following link:
#
Topics & Scenes
VR contents are organized into Topics and Scenes. A topic is a collection of scenes. A scene represents one 360 photo or video.
#
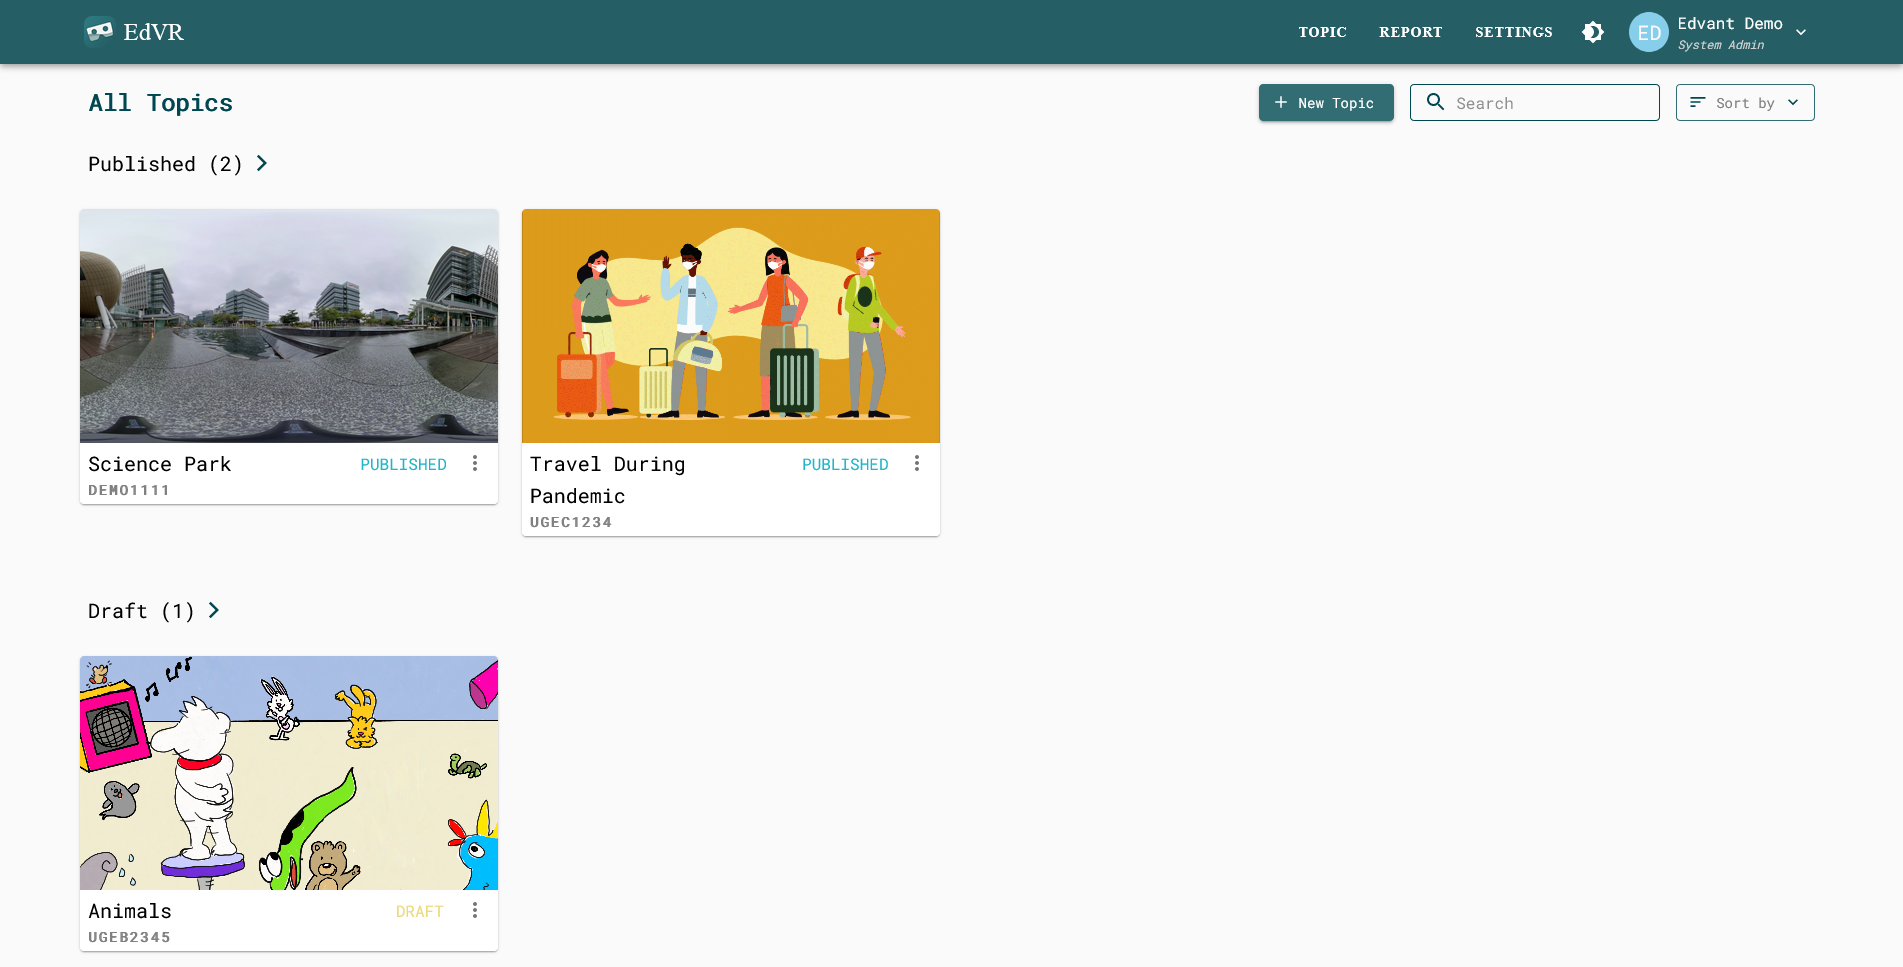
Topics
Topics are like folders containing all the VR scenes related. One can travel between scenes within the same topic through teleportation points, which will be discussed later as a point of interest.
To create a new topic, press the button.

The above window will be shown, to which you should upload a cover photo for the topic, input a title and a course code for the topic. By default, the Topic will be created as a Draft. Press the button to confirm.
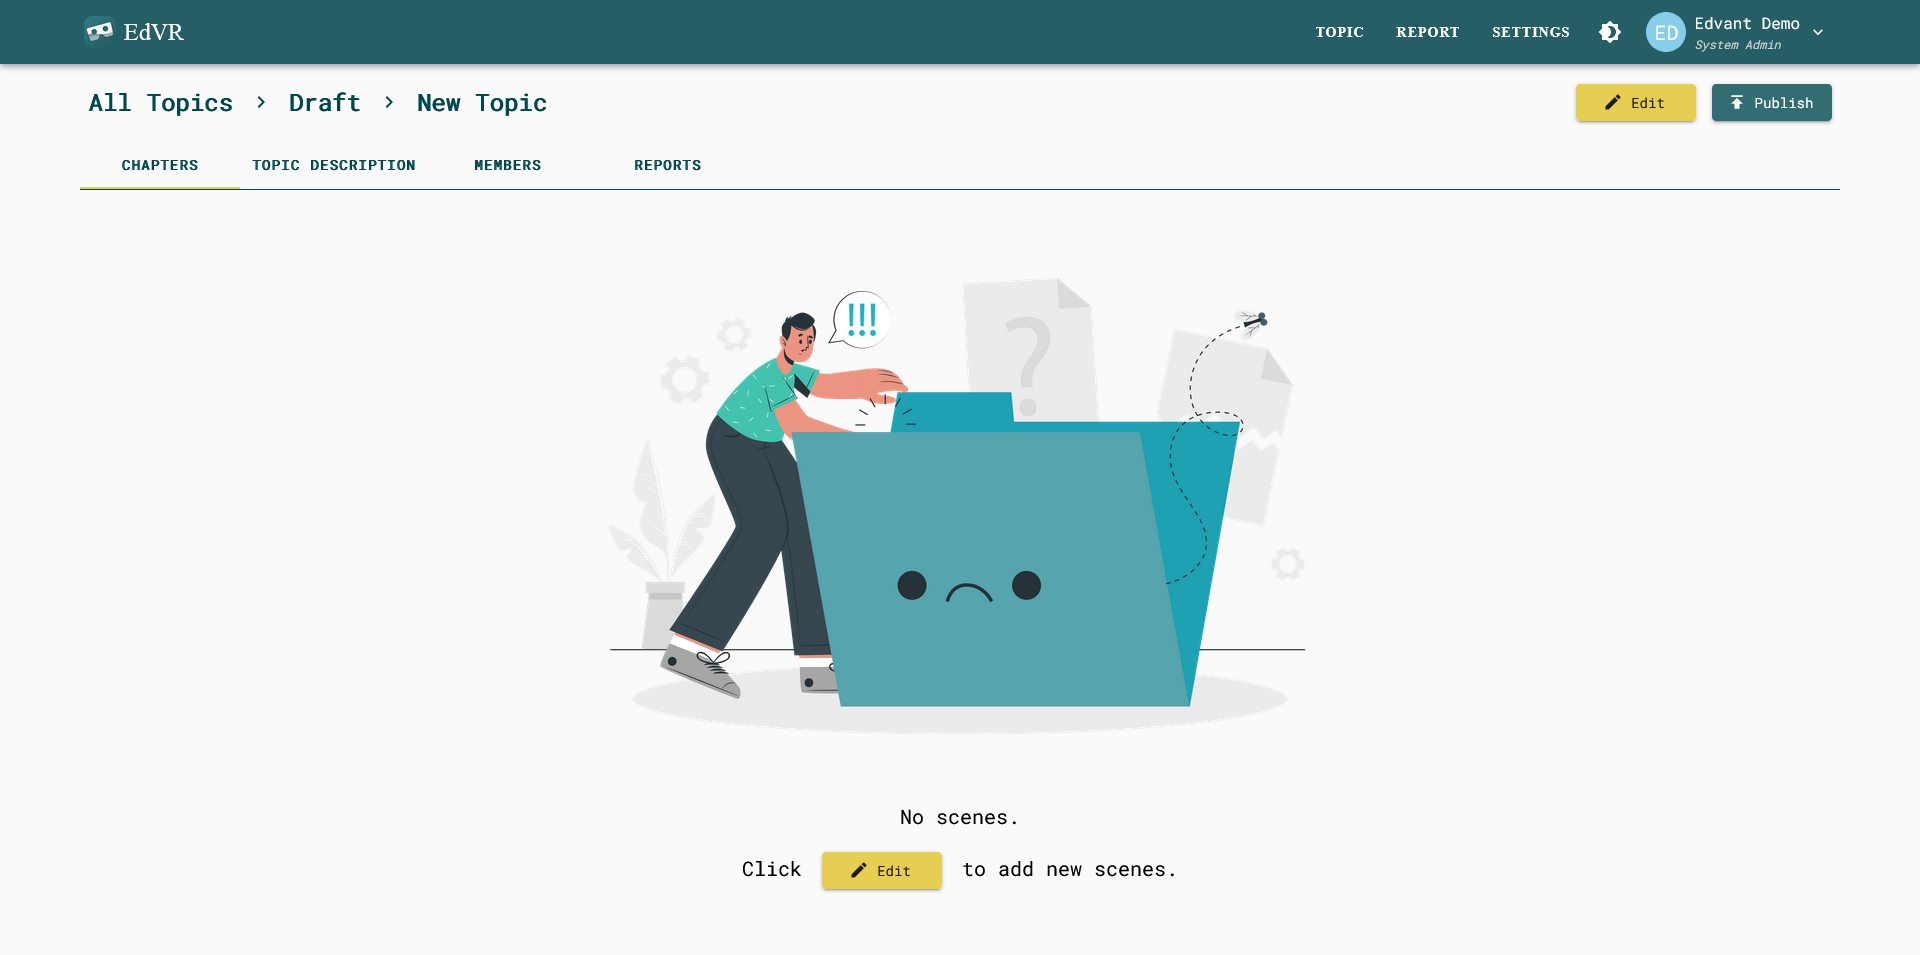
You should have been transferred to the topic preview page as shown above, in which you can add new scenes for the topics, edit the topic description, who can edit or view this topic, and view the report of the topic.
#
Scenes
To create a new scene, first press the button.

This will turn on the Topic Edit Mode. Then click the to create a new scene.

Similar to new topic creation, a new scene creation window will be shown. Upload a cover photo for the scene, input a title and select whether it consists of a 360 Image or 360 Video. Then press the button to confirm. Press to exit the Topic Edit Mode.
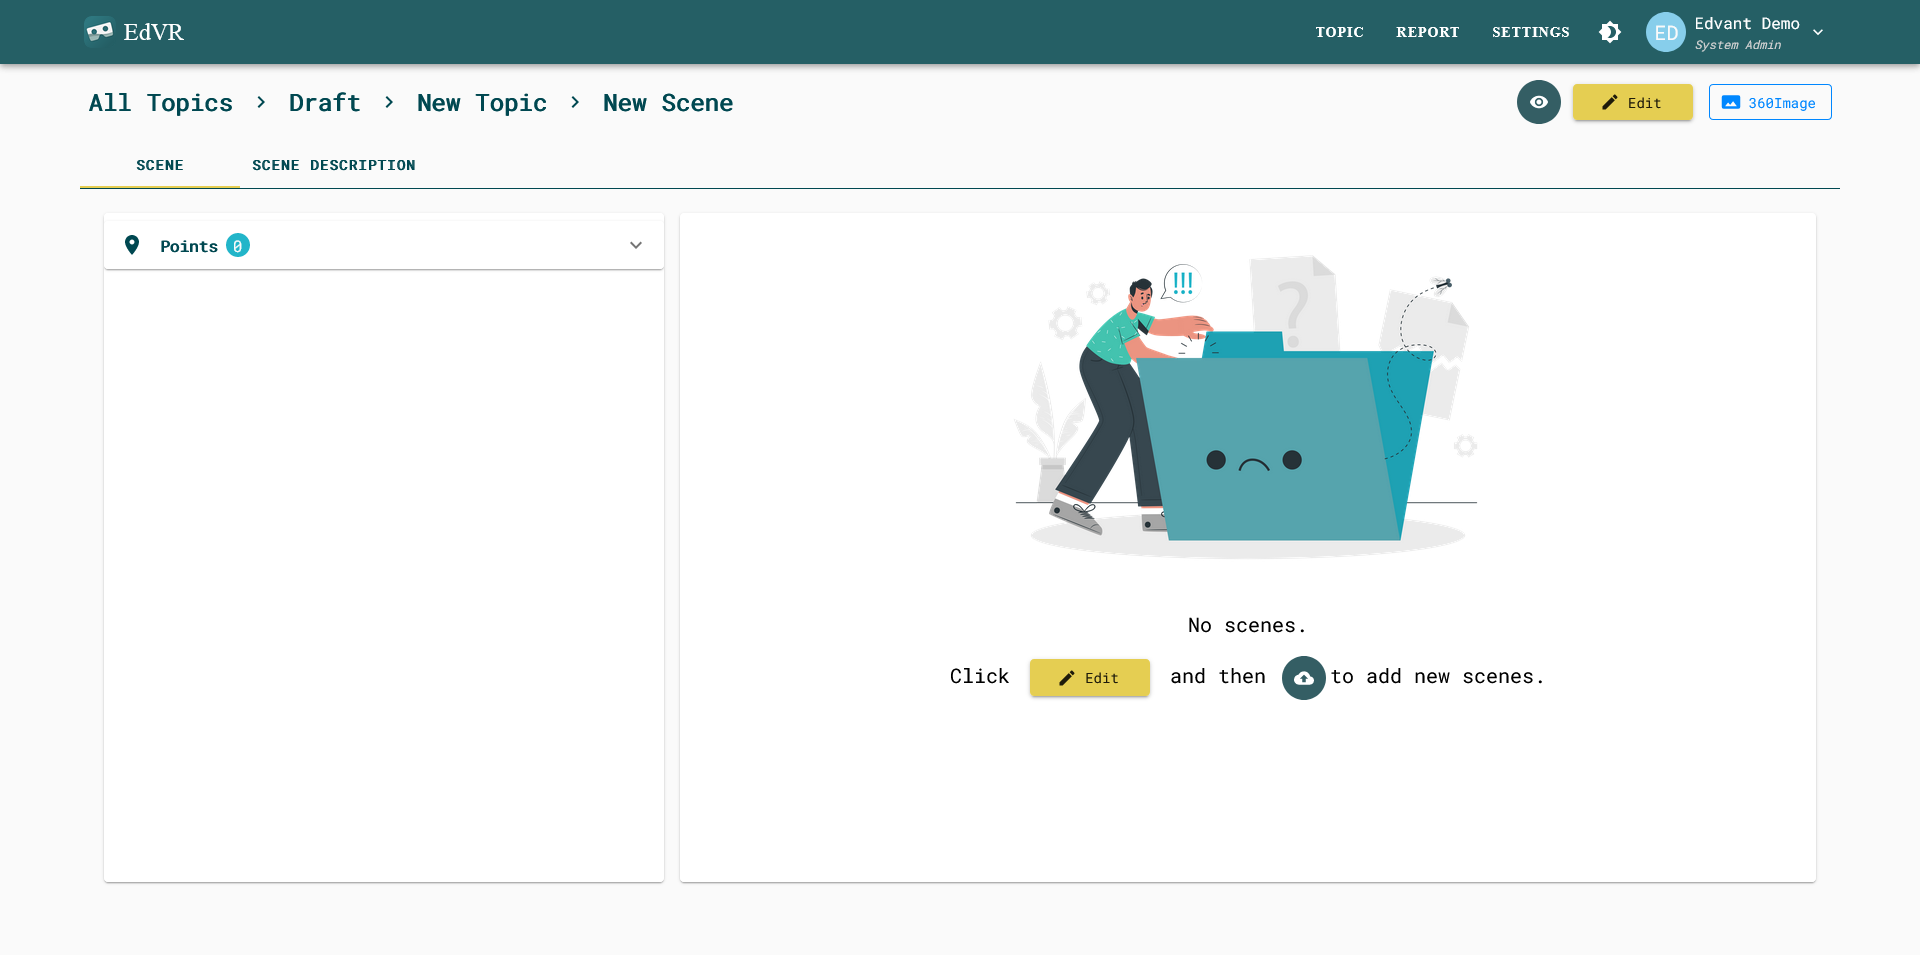
Click on the scence to enter the scene preview page as shown above.
Press the button, which turn on the Scene Edit Mode.

Press the upload button to upload a 360 image/video to be used as the VR scene.
Beware of the difference between 360 images/videos from panoramic photos.
Press button to save afterward and your VR scene are done for viewing. You should be able to preview the scene in the preview window.
Don't forget to save
All changes done in the Scene Edit Mode need to be save for it to be valid, including uploading 360 images/videos and creating Points of Interest.
#
Points of Interest
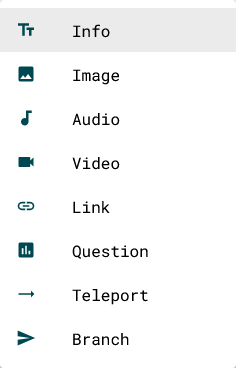
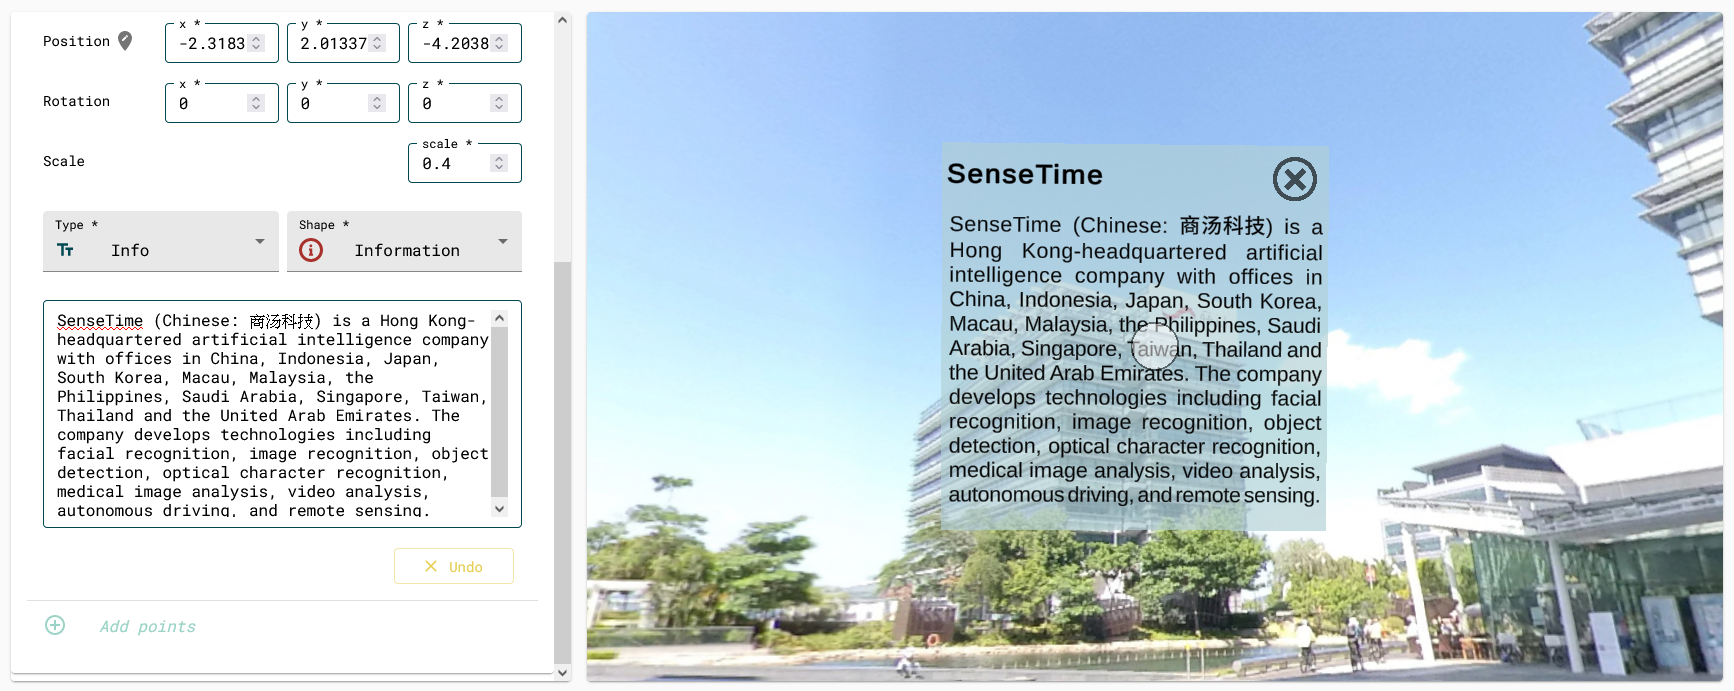
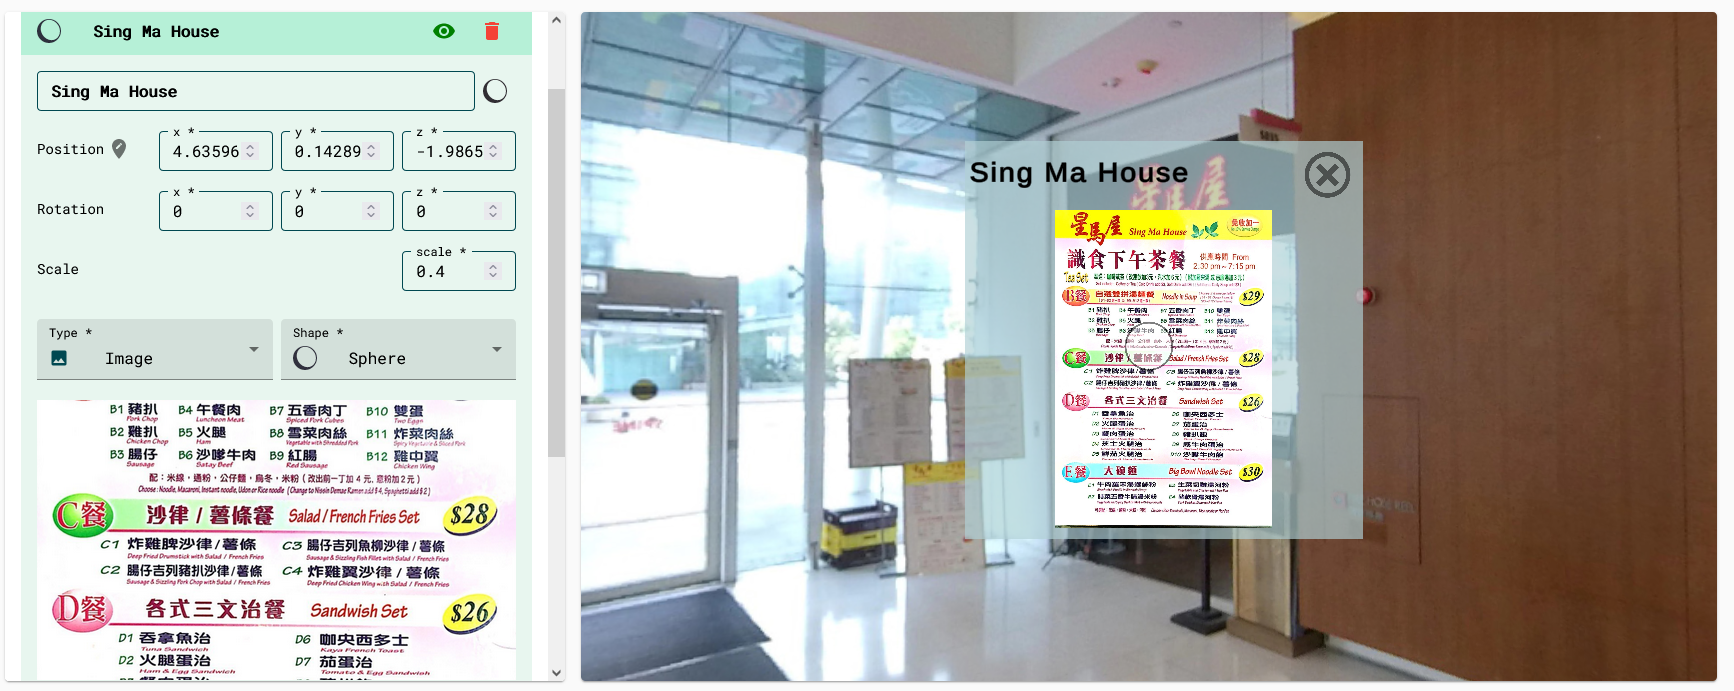
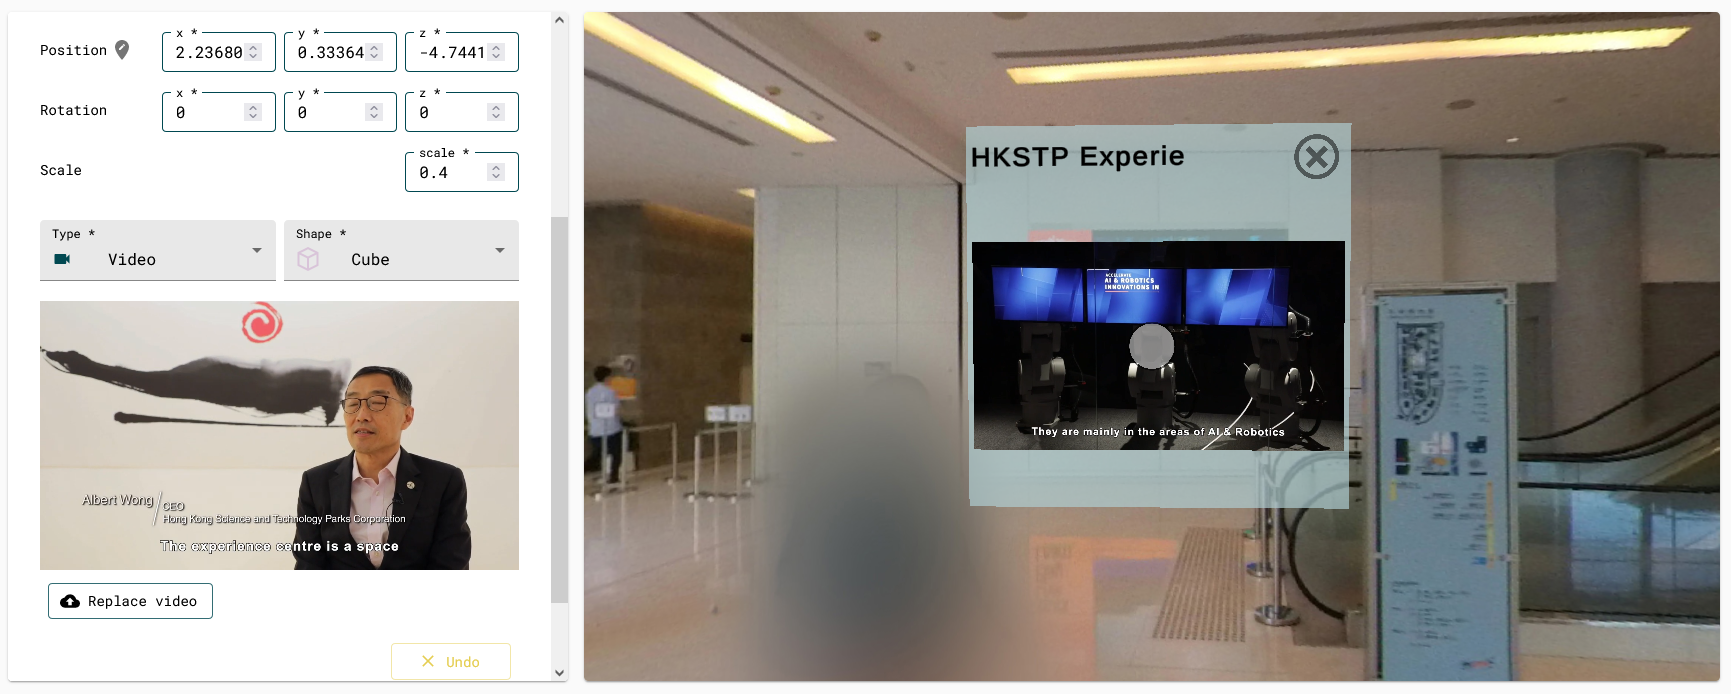
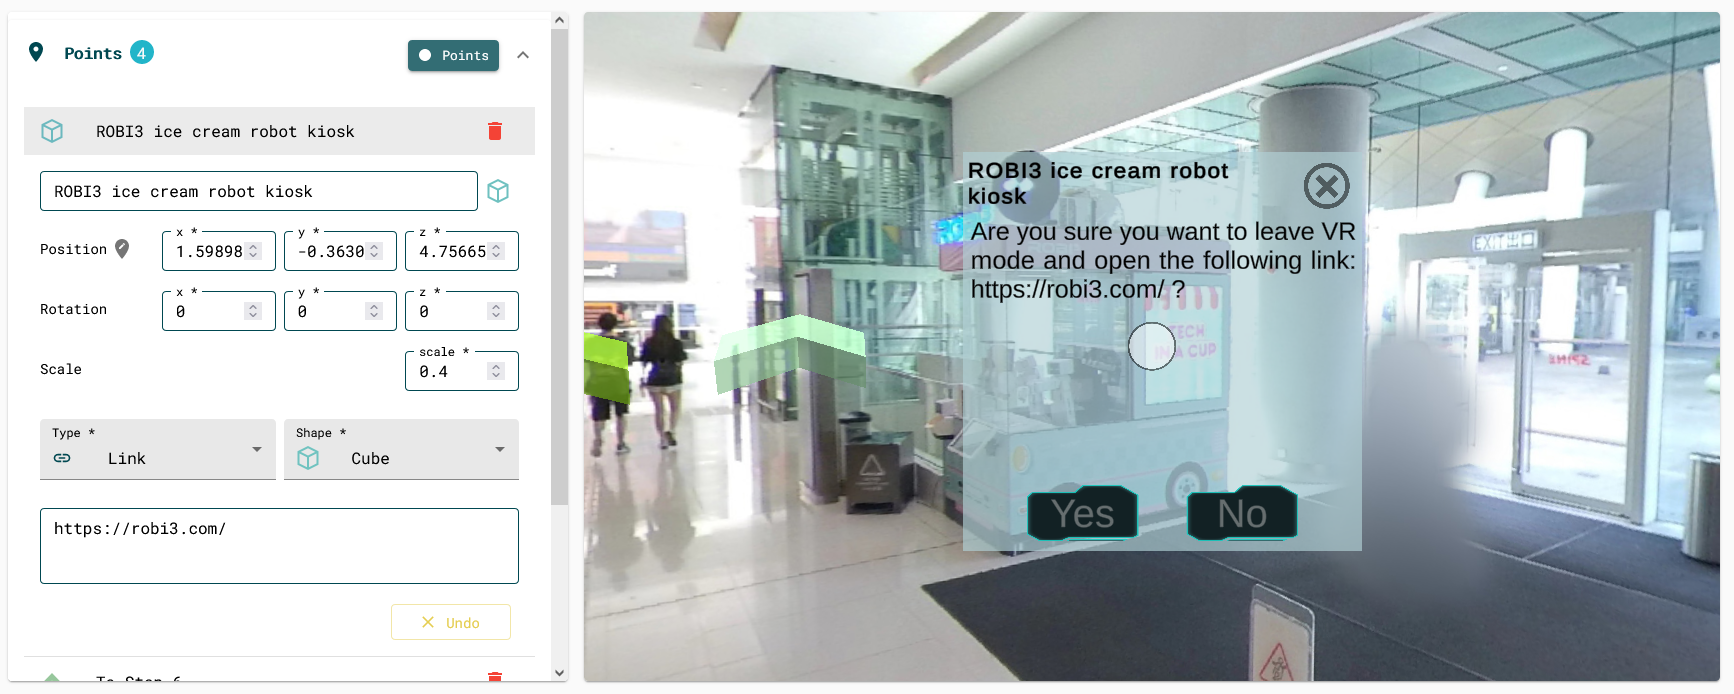
To spice up the scene, you can add some Points of Interest, which are some interaction points one can interact with in the scene. Currently 8 types of Points of Interest are supported in the EDVR. They are Info(text), Image, Audio, Video, Link, Question, Teleport and Branch.
To add a new Points of Interest, first press the button to enter the Scene Edit Mode.
Right click on a position where you want to add a new Point of Interest inside the preview window of the scene to add a new point, which will be shown as a sphere of a random colour as default.

Click on the point panel on the left to expand it. You can edit title, the colour(by clicking the circle next to the title), the position and rotation of the point, and then the type and shape of the point.
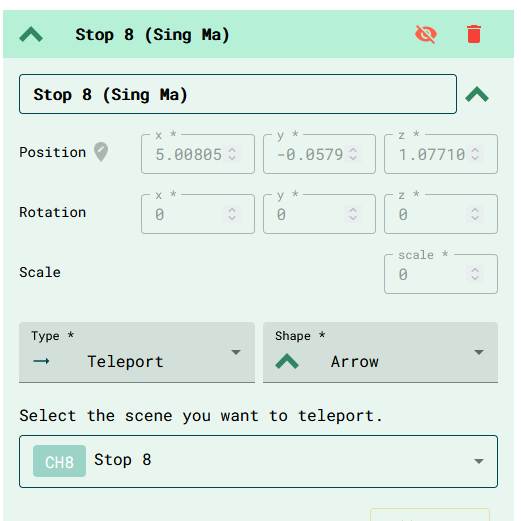
The visibility of each point can be toggled on/off by clicking the button. Invisible points cannot be seen during VR mode, and can only be triggered by a Branch point (to be explained below).
Input the desired text in the description box.
Click the upload box to upload the desired image file.
Click the upload box to upload the desired audio/video file.
Input the desired link in the description box.
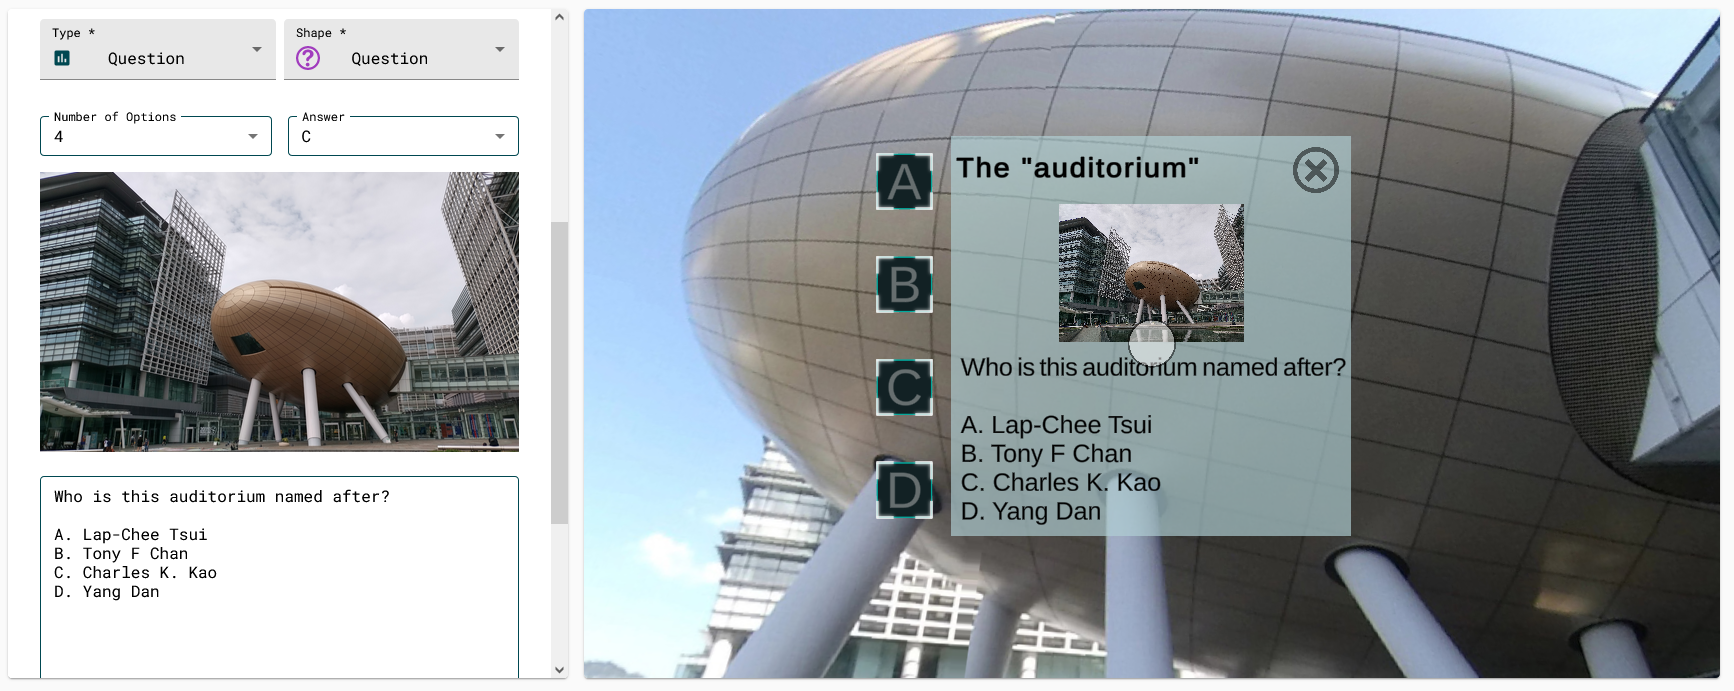
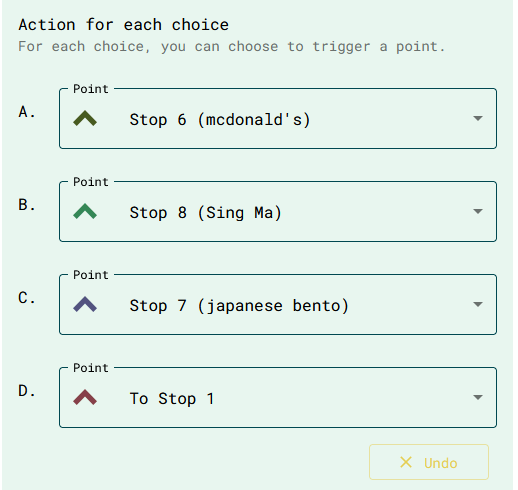
Only Multiple-choice question are supported. Select the number of options(e.g. A-D) and select the correct answer.
Type in the question and elaborate each choice in the text box. You can upload an image too.
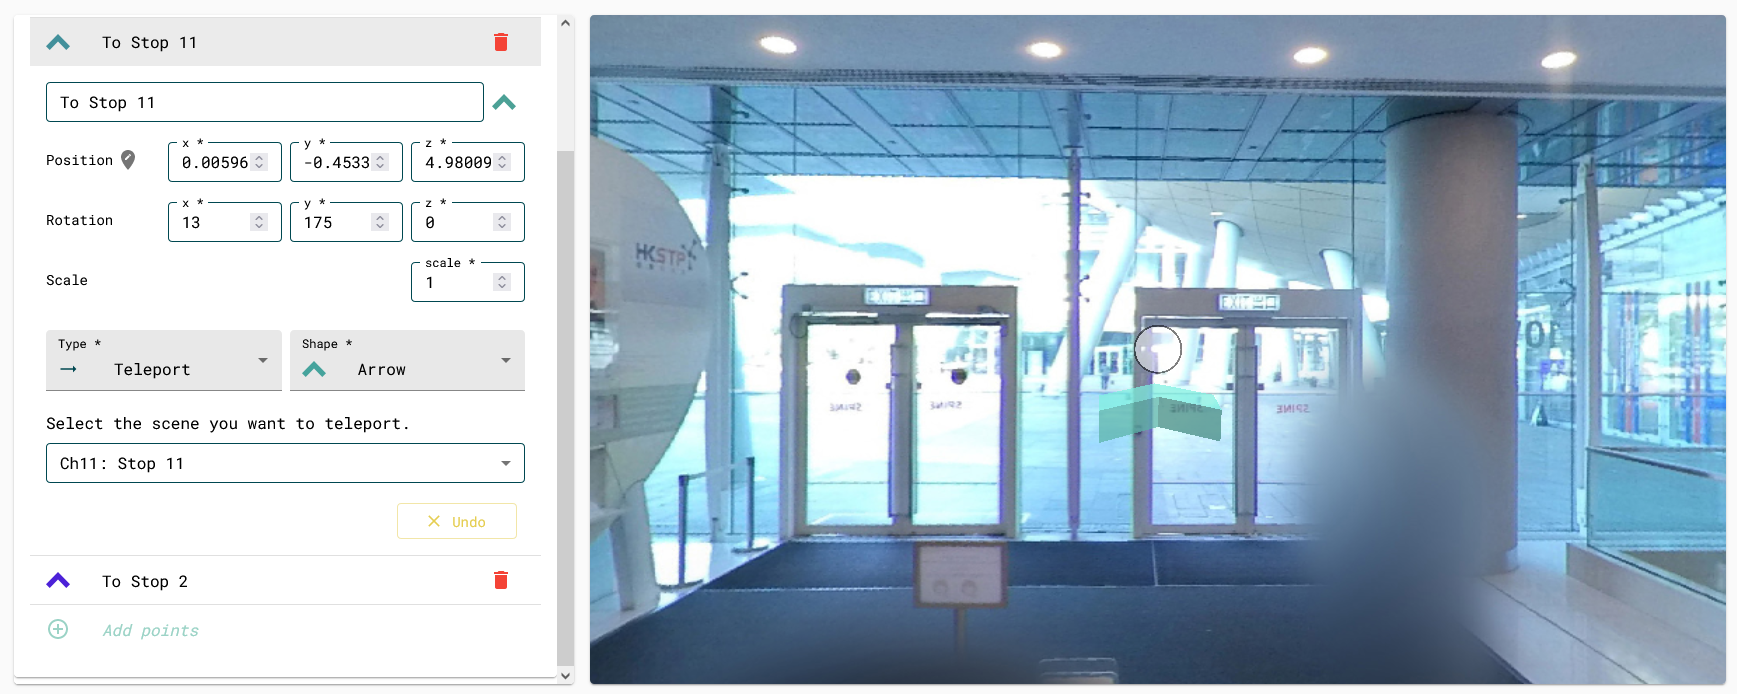
Click the select box to select another scene to be teleported to.
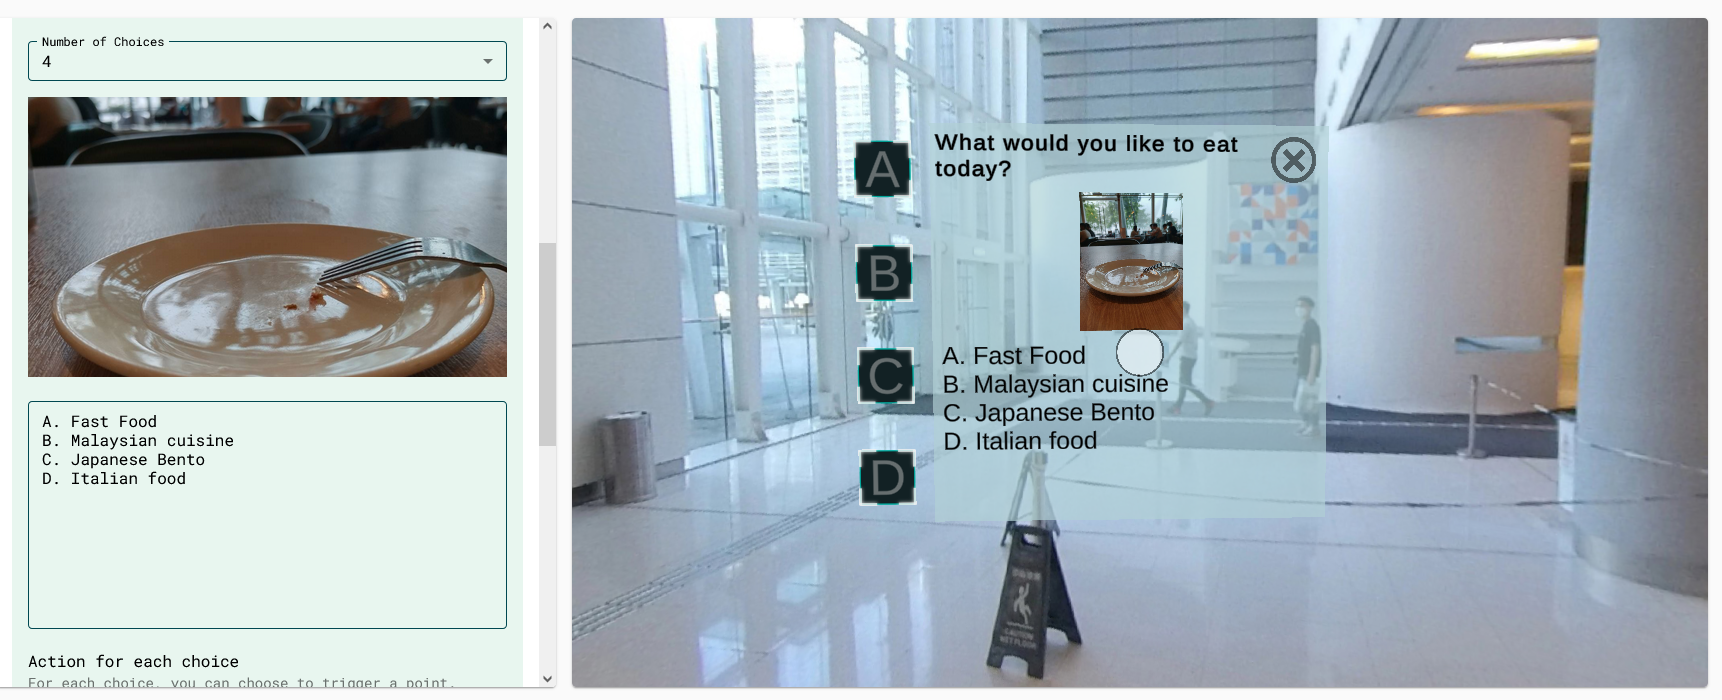
Branch are Multiple-choice question, which each choice triggers another point of interest. Those point can be a teleport point, another mc question or any media. Branch allows you to create a chain of interaction to guide the viewers in your VR world.
Press button to save.
#
Sharing a Topic
You can share the topic you created with anyone.
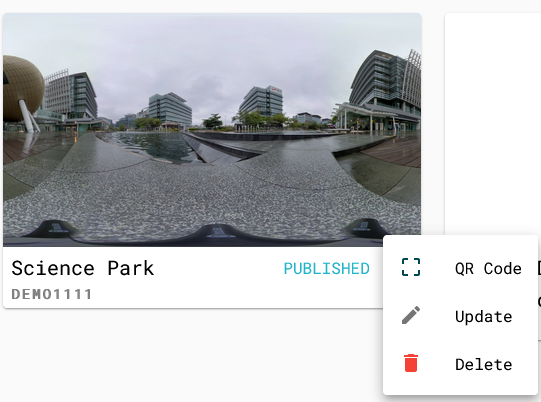
On the topic preview window, click the button on the bottom right, and then QR Code.

Show this to those you want to share the topic with so they can access it on the mobile app.
Read Viewing a New Topic for more details.